How do you Control a Telescope with C2A
C2A enables you to control a telescope through a serial port. Controlling refers to all the following functions:
- Continuous display of the telescope
position in Right Ascension and Declination
- Display the current telescope position as
a target on the map
- Calibrate the telescope with C2A (that is
to say, tell the telescope controller the location on the celestial sphere
at which the telescope is pointing). Calibration can be performed directly
through the map in the main window (right-click an object, sub-menu Telescope
and command Calibrate telescope) or by inputting coordinates manually.
- Slew the telescope to given equatorial
coordinates (right ascension and declination). Slewing can be performed
directly through the map in the main window (right-click an object, sub-menu
Telescope and command Slew to Object or Slew to Position)
or by inputting coordinates manually.
For more details of the components of the hand controller
interface, go to the section dedicated to telescope
hand controller.
Native telescope interfaces which are supported by C2A are as follows:
- Meade LX200 (or all other telescopes supporting the LX200 native protocol).
C2A was validated on an LX200 / 2 - version 3.30L and version 4.341L
(AltAz mode).
- Celestron NexStar
- SkySensor 2000 PC telescope controller. C2A was validated on a SkySensor 2000 PC
version 2.10.
- AudeCom controller.
- Mounts controlled by the Gemini
Pulsar system (e.g. G42).
- Astro-Physics GTO mounts equipped with the latest GTOCP3 controller.
- PicAstro controller.
In addition, C2A
supports telescopes compatible with the ASCOM standard (see http://ascom-standards.org/).
C2A has been validated with a number of ASCOM drivers, including the
AstroPhysics ASCOM driver and Losmandy Gemini ASCOM driver.
Initial Configuration of your Telescope
To be able to use the telescope control function in C2A,
you must have one of the models of telescope previously mentioned or an ASCOM
compatible telescope. The connection is made through a serial port on the
computer running C2A. To launch and configure the telescope control interface,
go to the Telescope menu and select the command Hand controller….
Then follow these steps:
- In the hand controller, click the
button Options...
The telescope options dialogue box is displayed.
|

|
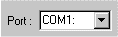
- In the first tab of the options box (Interface),
begin by selecting the serial port to which your telescope is connected.
Com ports present on the machine are automatically detected by C2A and
added to the list.
|
|
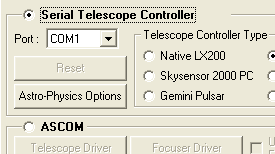
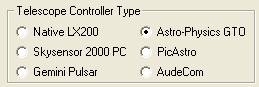
- Select the general kind of telescope
you wish to use, that is to say a telescope which is natively supported
through the serial port, or an ASCOM compatible telescope.
|
|
- For a telescope controlled through
the serial port, select the type of telescope connected in the Telescope
controller type area. At this stage, 6 types of telescope are
supported: native LX200, SkySensor 2000 PC, Celestron NexStar, Gemini
Pulsar, AstroPhysics GTO, PicAstro and AudeCom controller.
|
|
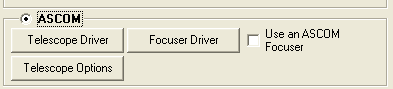
- For a telescope controlled by the ASCOM
standard, click the Telescope Driver button and choose the exact
type of telescope you want to drive. Important: You must already have
installed the telescope driver on your machine. To do this, go to http://ascom-standards.org/downloads.html,
and download the package “ASCOM platform 5” (which is the version available at in May 2011) or a more recent version, and install it on your
machine.
- Having installed the ASCOM driver, you
can choose the telescope to drive. C2A displays a list of drivers
installed on your machine, and you can set up the selected driver with
the Properties... button in the dialogue box.
- Staying in the ASCOM area, now click
the Telescope options button. The allows you to specify the
different rates of movement of the two axes of your telescope in
accordance with the capabilities of the controller. In this dialog box,
click the Update button for a list of valid rates returned by the
driver. Note that not all telescopes allow this adjustment (in which
case Update returns nothing in the area displaying speeds). If this is
the case, do not input speeds as these will not be used. You can also
specify in this dialogue box if you want to manage telescope parking and
sidereal tracking (note, as before, these two functions may not be
supported by all telescopes).
- If you use an ASCOM focuser, click the
check box Use an ASCOM focuser and choose the focuser using the Focuser
driver button.
|
|
- Click OK to close the options box.
|

|
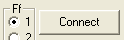
- Click the Connect button on the
hand controller. If the connection is correctly established with the
telescope, you will see that most of the components of the hand
controller have become accessible, and the telescope’s current position
will be displayed (in right ascension and declination).
|
|
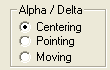
- Select the moving speeds Alpha And
Delta on the right hand side of the hand controller. Three speeds are possible:
Centring (low speed) Pointing (intermediate speed) and Slewing (high
speed). For example, select pointing. If the Alpha and Delta speeds are
related (Same RA and DE speeds option checked) a single area of
speed control is accessible, since Alpha and Delta speeds are defined as
the same.
|
|
- Press the buttons (Alpha+, Alpha-,
Delta+ and Delta-) on the hand controller and watch how this moves your
telescope. You can try different speeds. If the movements of the
telescope do not correspond to the direction you want, go back to the
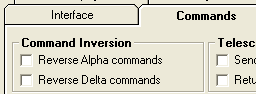
telescope options dialogue box (the Options… button on the hand
controller, go to the Commands tab and choose Reverse Alpha
commands or Reverse Delta commands.
|
|
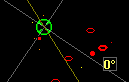
- The position of the telescope is
continuously indicated in the C2A map by a green circle. You can
re-centre the map automatically on the telescope position with the
command Go to Telescope Position in the Telescope menu. A
shortcut to this command is SHIFT+F3. You can also keep the
telescope target always in the centre of the current view. To do this,
just check the option Continuous target tracking in the Telescope
menu. A shortcut to this command is SHIFT+F4.
|
|
When you press the arrow button (with the left mouse
button) in one of the movement directions, the telescope will continue to move
until the button is released. The button just to the left of the arrow lets you
latch movement on (that is to say, movement will continue after releasing the
left mouse button). Another click on the same button (or a click on the hand
controller stop button) stops movement. The figure below shows the two
types of buttons:

Automatic Slewing and Calibration of a Telescope
Automatically slewing the telescope towards a given object (the GOTO function) can be achieved in two ways:
- You can go to the area Calibration/Slew
on the hand controller, fill in the Alpha and Delta (or azimuth/altitude)
fields and click the Slew button on the right of this area.
- You can launch a slew command directly
from the map in the main window of C2A. To do this, select an object on
the map by right-clicking it, go to the sub-menu Telescope and choose
Slew to Object or Slew to Position. This will cause
the telescope to slew to the object (or position if there is no object at
that place) to which the mouse is pointing.
Similarly, you can calibrate the telescope in equatorial
(or horizontal) coordinates (that is to say, you can tell the telescope the
location on the sky to which it is pointing). This can be done in two ways:
- You can go to the Calibration/Slew
area on the hand controller, fill in the Alpha and Delta (or azimuth/altitude)
fields and click the Calibrate button on the right of this area.
- You can launch a calibration command
directly from the map in the main window of C2A. To do this, select an
object on the map by right-clicking it, go to the sub-menu Telescope
and choose Calibrate telescope. This will cause C2A to send
the telescope the coordinates of the object to which the mouse is
pointing.
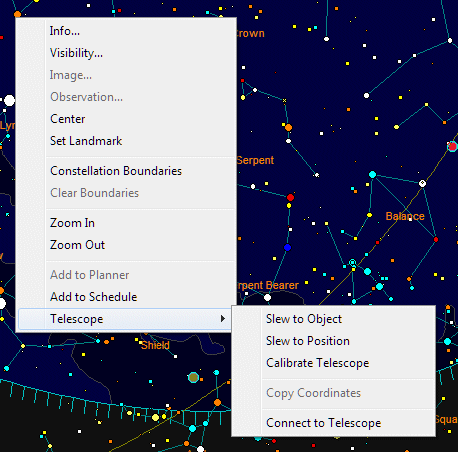
The figure below shows the two commands for slewing and
calibration accessible through the contextual menu of the map (right-click on
object):
The figure below shows the input area on the telescope hand controller along with the slew and calibration buttons:
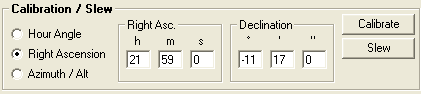
Notice that you can specify either right ascension or hour angle to be entered in this input area.
Troubleshooting Potential Problems
Here are solutions to some problems you may encounter.
When I click the Connect button on the hand controller I get an error message.
- Make sure that the serial port declared
in the options box (see above) is really the one connected to the
telescope.
- Make sure that the telescope is powered
up and reliably connected to your PC.
- Make sure that your telescope is supported by C2A (see list above).
I get this error message (for telescopes controlled through the serial port):
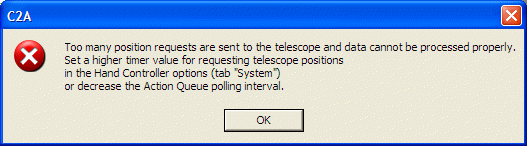
All requests for position and commands sent to the
telescope are managed by a controller in C2A. If position requests are too
frequent for the power of the machine running C2A, the controller saturates and
causes this error message. To solve the problem, proceed as follows:
- On the hand controller, click the Options... button. The telescope options dialogue box will be displayed.
|
|
- In the options box, select the System tab.
|
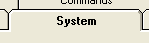
|
- First try changing the Position
request value. Instead of 500ms, change to 1000ms, for example (the
telescope position will be polled every second in stead of every half
second).
|
|
- If this still does not work, change the
value of the Action queue (which corresponds to the time cycle of
the controller). For example, use 50ms rather than the 100ms default
value.
|

|
- If you still get the same error
message, try other values until the communication with the telescope
works properly. Note that you do not have to re-enter these values every
time, because C2A remembers them for the next session.
|
|
Table of Contents